
In the age of digital information, having quick access to a vast collection of eBooks and academic resources can be a game-changer for students and avid readers alike. If you're pursuing a master's degree or simply have a passion for literature, building your own eBook library is a rewarding project that offers convenience and customisation. In this guide, I will take you on a journey to create a Raspberry Pi-powered eBook library that's not only easily accessible but also boasts the ability to power down and start key services automatically. Plus, I will show you how to effortlessly add new content to your library and even set up a backup solution to ensure your literary treasures are safe. Whether you're a tech enthusiast or a beginner looking for a DIY project, this tutorial will transform your Raspberry Pi into a literary treasure chest.
Overview#
The core goals of this project are:
- Provide an easily accessible eBook library
- Power down and automatic start on boot up of key services
- Enable easy access to add new content to calibre libraries
Required Parts#
The following parts are required:
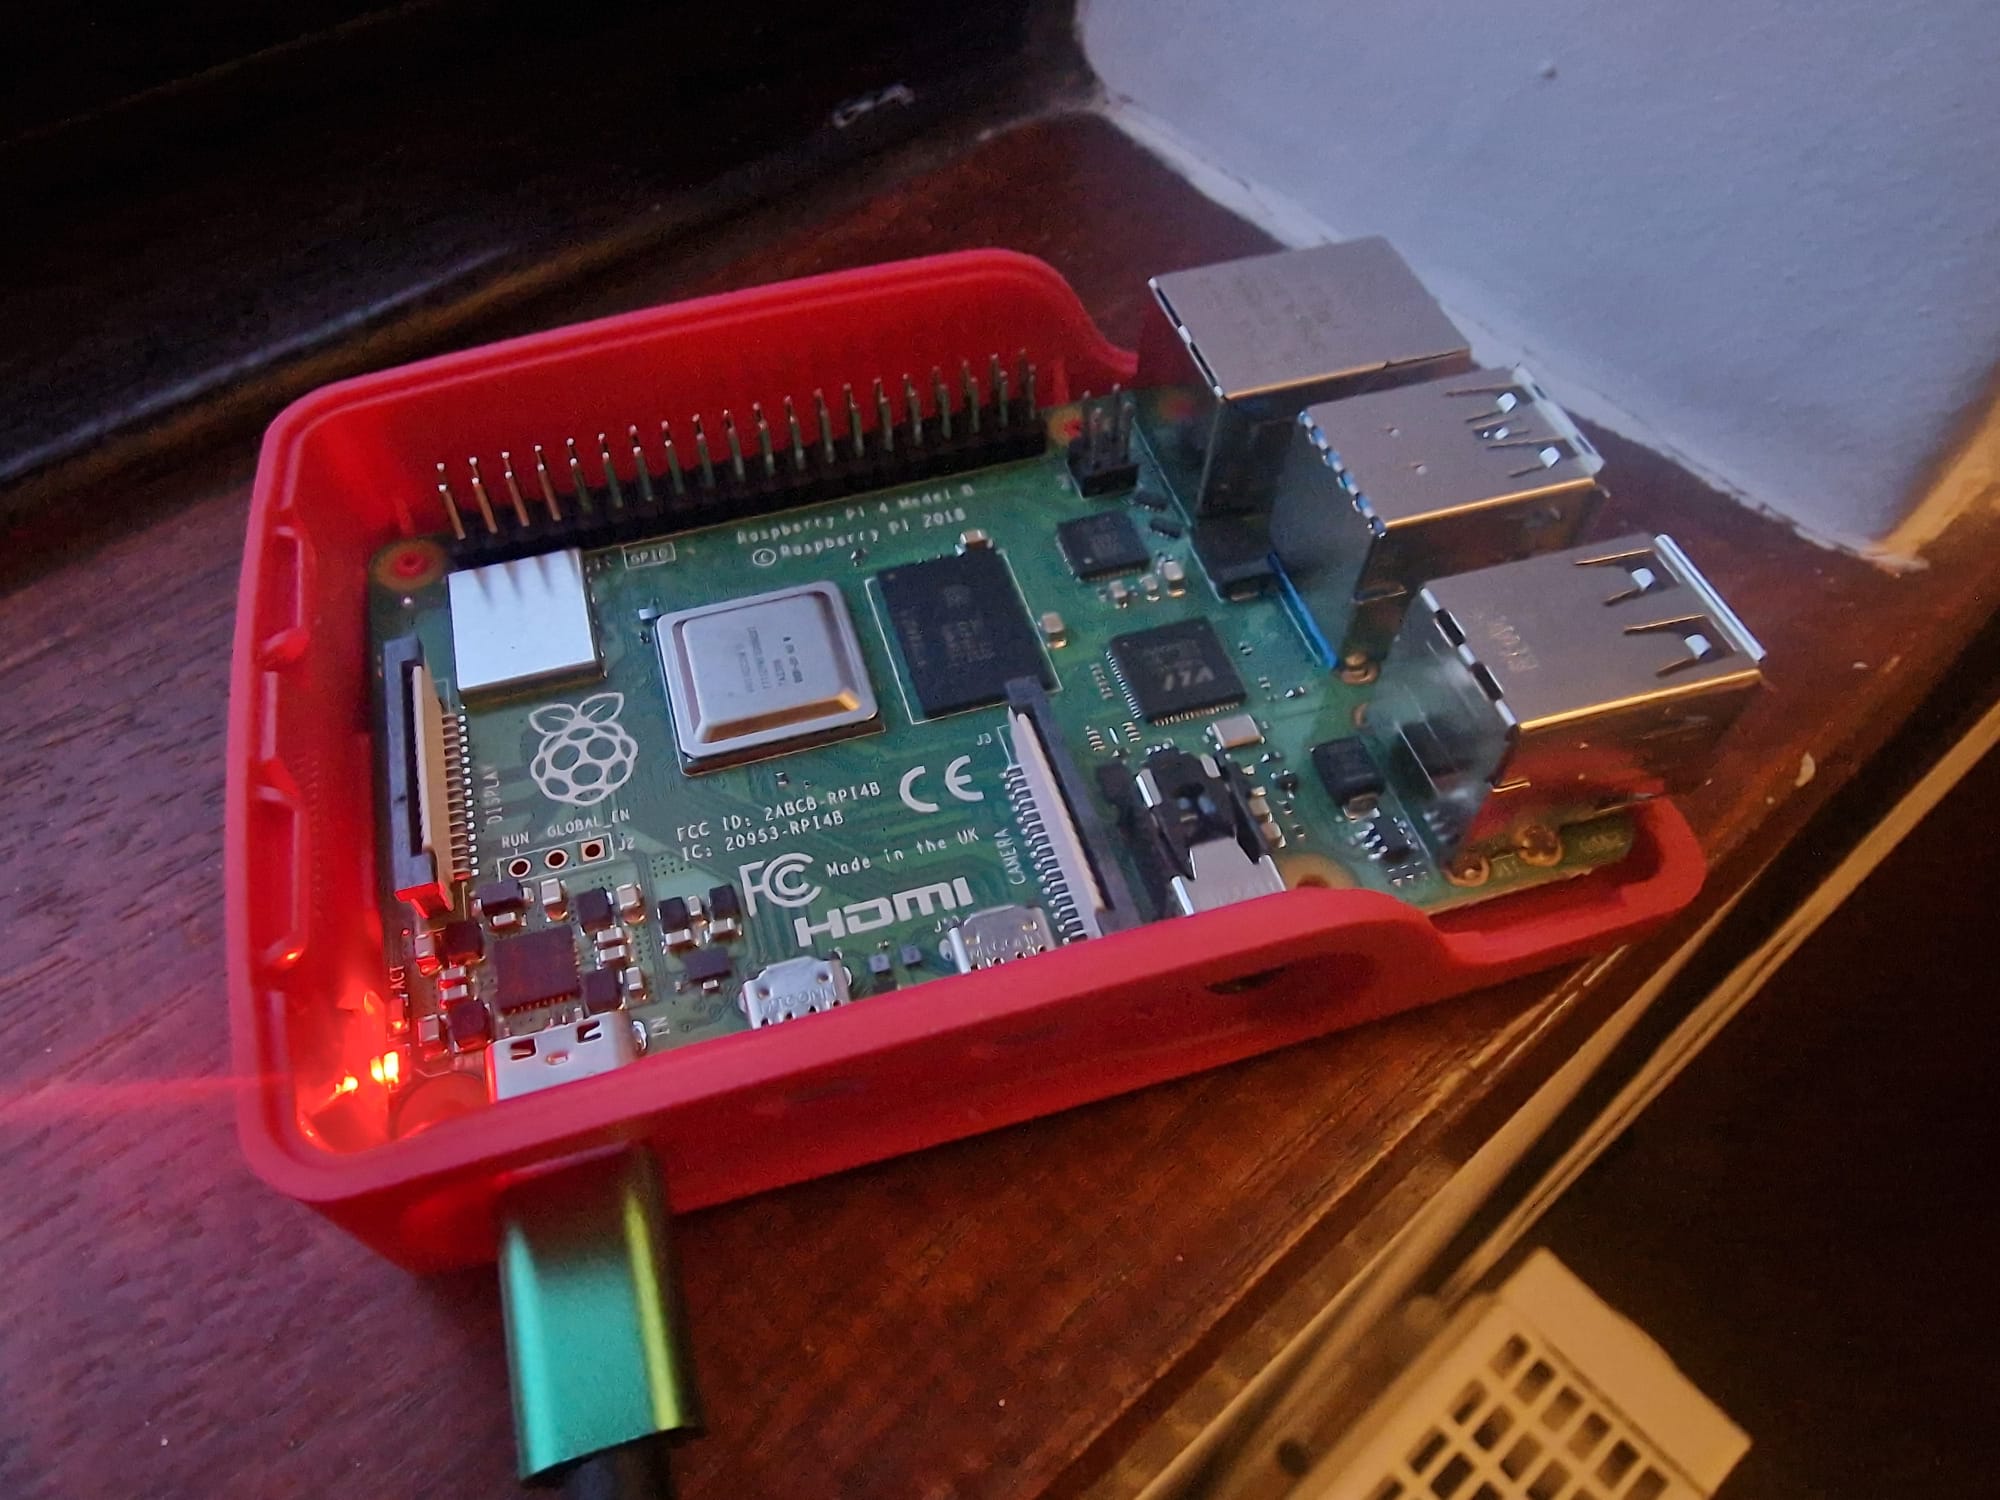
- Raspberry Pi (I'm using a Raspberry pi 4 2GB model)
- Micro SD card
- Case
- USB-C for Power
As this is a simple Raspberry Pi project, the requirements are minimial. I did almost buy a Raspberry Pi case, and then found I already had a spare Raspberry Pi 4 case. During the Raspberry Pi shortage, on occassion the Raspberry Pi 4 kits (SD card, Power supply, Case, and Raspberry Pi 4) would become avalible. Due to the difficulty in getting a Raspberry Pi at this time, paying the inflated price was worthwhile, even if it meant I ended up with a case I did not need at the time.
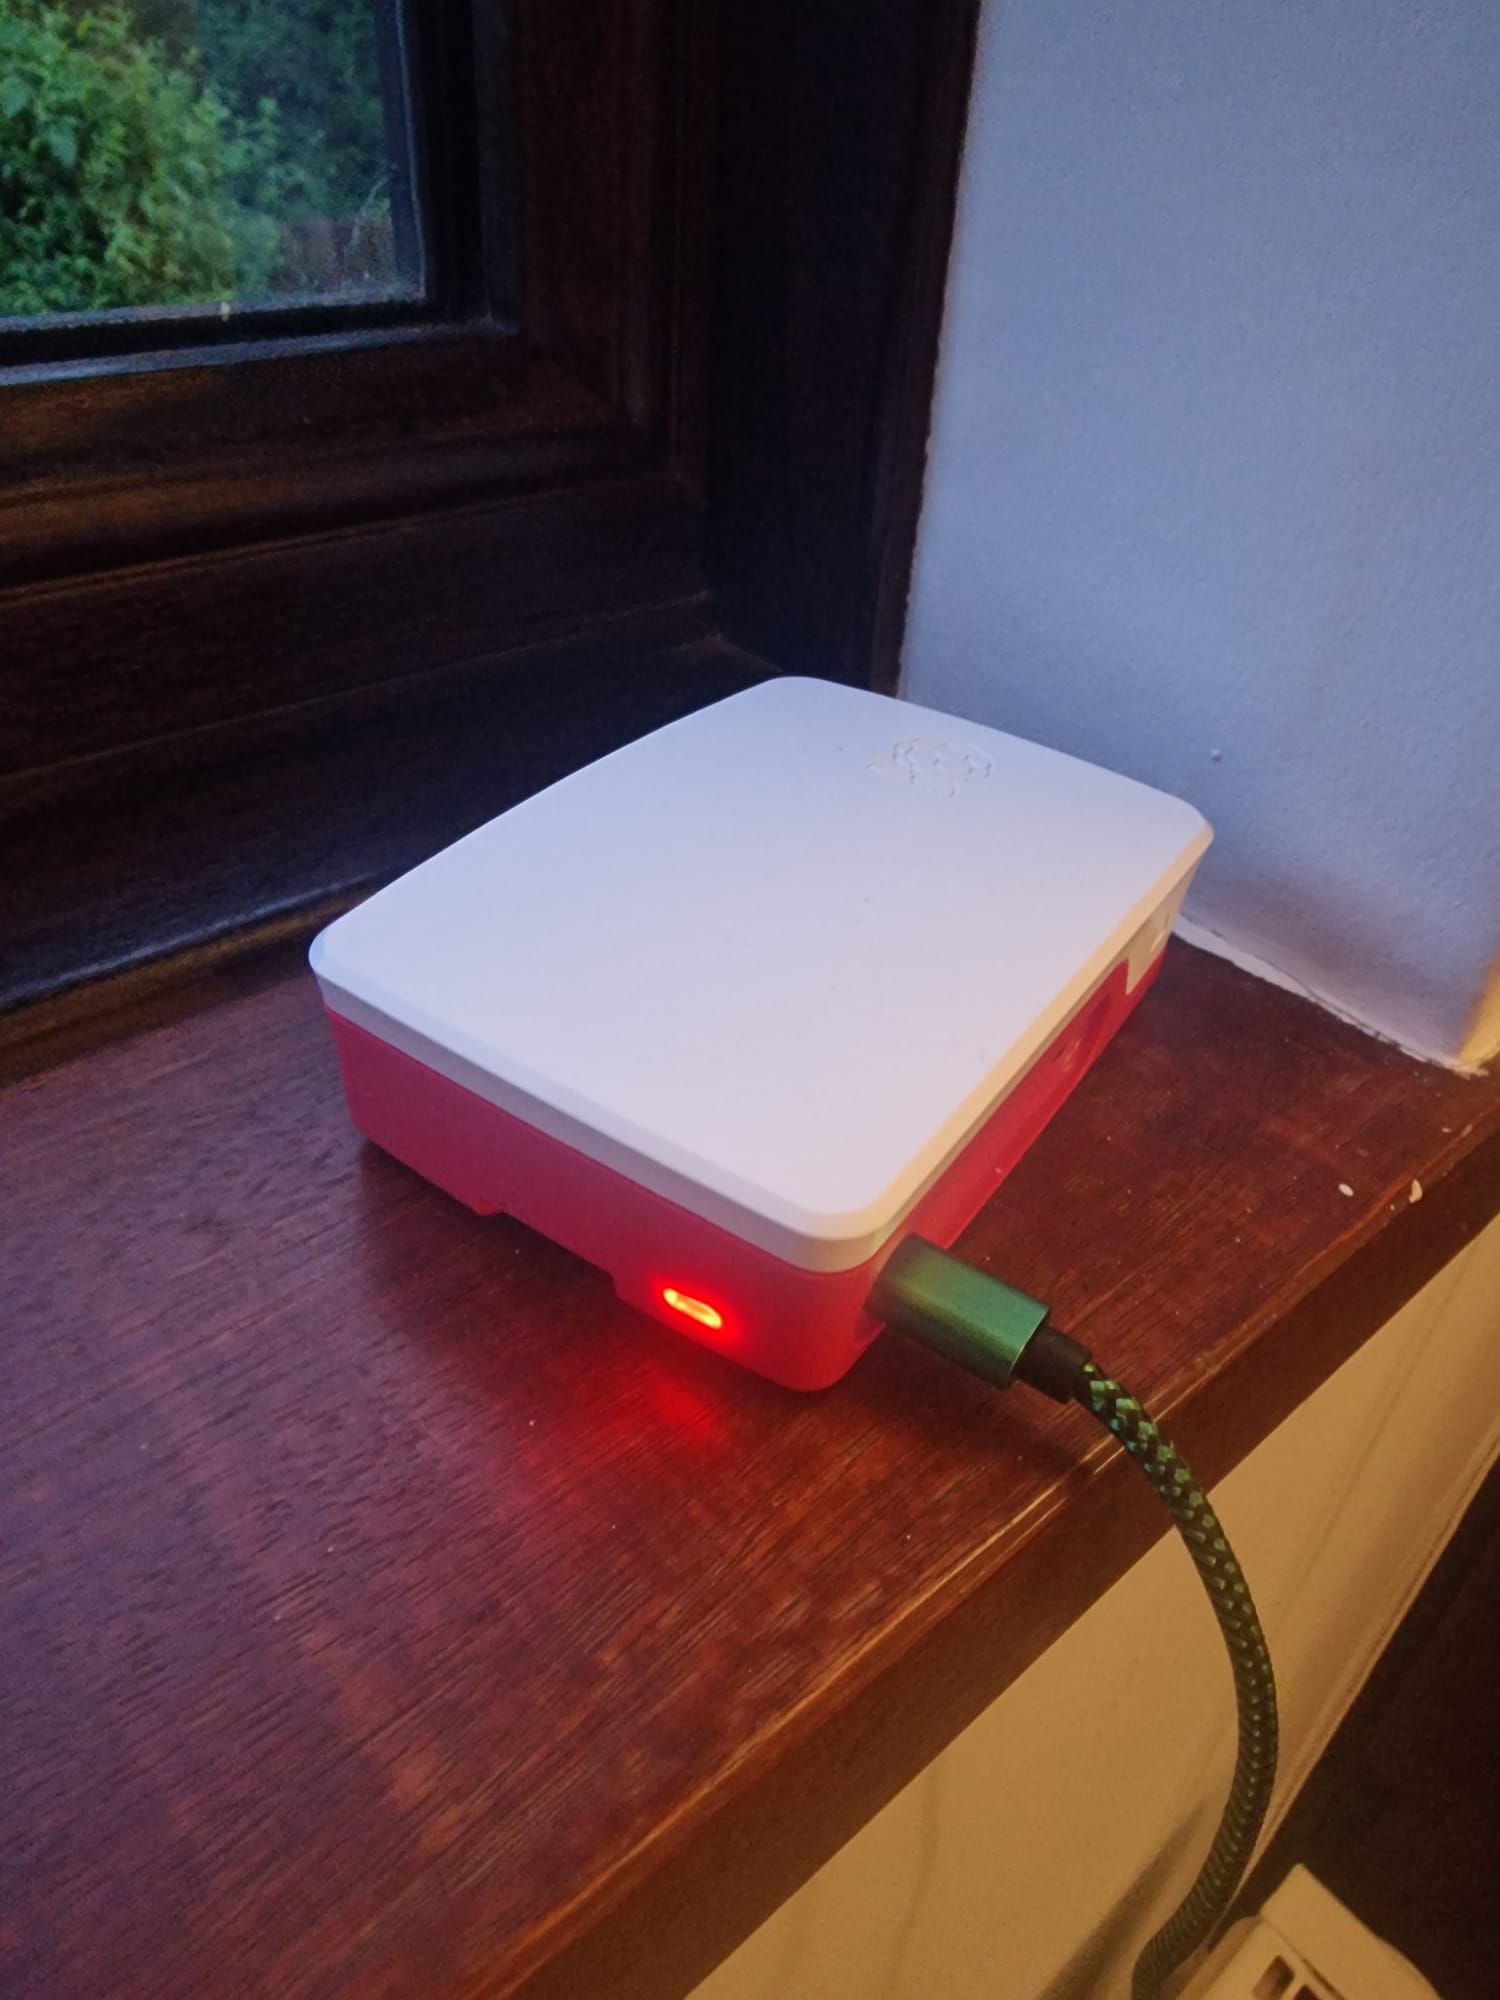
Setting up the hardware#
To get the Raspberry Pi up and running:
- Create the SD card with the 64-bit image of Raspberry Pi OS
- Insert micro SD card
- Construct the case
- Connect power to Raspberry Pi
- Test that you can connect via terminal that the Raspberry Pi is Running.
- Update the Raspberry Pi
sudo apt update && sudo apt upgrade -yAt this point the Raspberry Pi is operational and fully updated.
Remember to create a Raspberry Pi OS using the 64 bit version
Docker#
Docker enables applications to be run in containers. Enabling easy deployment and avoids potential compatibility issues between applications.
The following commands will install Docker:
sudo apt updatesudo apt install docker.iosudo systemctl enable dockersudo systemctl start dockerNow Docker has been successfully installed you will need to set up the Calibre Container
Calibre Container#
Calibre has been selected as it provides an excellent e-book management system. Both for managing metadata and browsing the ebook libraries.
To create the Calibre container you need to first pull linuxserver/calibre. This will download the Calibre container to the Raspberry Pi.
docker pull linuxserver/calibreTo set up the permissions of the container we need to get PUID and PGID IDs. You can run the following commands to get the user IDs. In this case my user account is callled pi
id -p piid -g piIn the case of the user account pi both have the ID value of 1000.
Next we need to create the folders that will store the config and books. I'm putting them in a parent folder calibre
mkdir calibrecd calibremkdir configmkdir booksNow we are ready to create the Calibre container.
The following cmd is used to create the calibre container:
sudo docker run -d \ --name=calibre \ --restart=always \ -e PUID=1000 \ -e PGID=1000 \ -p 8080:8080 \ -p 8081:8081 \ -e TZ=Europe/London \ -v /calibre/books:/books \ -v /calibre/config:/config \ linuxserver/calibreFor clarity the following command is broken down to make it easy to adapt if required:
- Command:
sudo docker run -d - Container Name:
--name=calibre - Restart Policy:
--restart=always - User ID:
-e PUID=1000 - Group ID:
-e PGID=1000 - Port Mapping:
-p 8080:8080(Host:Calibre Book Management) - Port Mapping:
-p 8081:8081(Host:Calibre Content Server) - Timezone:
-e TZ=Europe/London - Volume Mapping:
-v /calibre/books:/books - Volume Mapping:
-v /calibre/config:/config - Docker Image:
linuxserver/calibre
I have included the Restart Policy so on reboot the Raspberry Pi will load Docker and then the Calibre Server will automatically start up. This also causes the container to restart in the unlikely event of the application crashing.
Adding books#
For this project, I'm making use of an Azure file share for the uploading of books and journal articles.
Primarily, this is for ease of use. I have added the file share to both her desktop and laptop. This means she can easily add files, then add the content to Calibre, and finally, editing the metadata.
To achieve this we need to:
- Create an Azure File Share
- Mount the shared drive
- Automatically mount the share on startup
Setting up an Azure File Share#
Log In to the Azure Portal
- Open a web browser and navigate to the Azure portal.
- Sign in to your Azure account.
Create a Storage Account
- In the Azure portal, click on "Create a resource" on the left sidebar.
- Search for "Storage account" in the search bar and select "Storage account" from the results.
- Click the "Create" button to start creating a new storage account.
- Fill in the required information for your storage account: Subscription: Choose your Azure subscription. Resource group: Create a new one or select an existing one. Storage account name: Choose a unique name for your storage account. Location: Select the region where you want to create the storage account. Performance: Choose the performance tier (Standard or Premium). Replication: Choose the replication option based on your redundancy requirements.
- Click the "Review + create" button to review your settings. Verify that everything is correct, and then click "Create" to create the storage account.
- Wait for the deployment to complete. You can monitor the deployment progress in the Azure portal.
Create a File Share
- Once the storage account deployment is complete, go to the storage account's page.
- In the left menu, under "Settings," click on "File shares."
- Click the "+ File share" button to create a new file share.
- Provide a name for your file share, and you can also specify the quota (size) for the share.
- Click the "Create" button to create the file share.
Add the following to /etc/fstab - Make sure you update the //AZUREFILES with your URL.
//AZUREFILES /calibre/config/books-to-add/ cifs credentials=/etc/smbcredentials/homecloud.cred,dir_mode=0777,file_mode=0777,serverino,nosharesock,actimeo=30,uid=1000,gid=1000,nofail 0 0- //AZUREFILES: This is the source location, which is the Azure File Share that you want to mount.
/calibre/config/books-to-add/: This is the target directory where the Azure File Share will be mounted on your local filesystem.cifs: This specifies the filesystem type to use for the mount, which is Common Internet File System (CIFS), commonly used for networked file shares.credentials=/etc/smbcredentials/homecloud.cred: It specifies the path to the credentials file that contains authentication information for accessing the Azure File Share. This file typically includes the username and password.dir_mode=0777: This sets the directory permissions to allow read, write, and execute permissions for all users (readable, writable, and executable by the owner, group, and others).file_mode=0777: This sets the file permissions to allow read, write, and execute permissions for all users (readable, writable, and executable by the owner, group, and others).serverino: This option requests the server to return unique inode numbers for each file. It can help in case of conflicts or issues related to file identification.nosharesock: This option disables the use of shared sockets, which can be used for communication between the client and the server.actimeo=30: This sets the attribute cache timeout to 30 seconds, controlling how often the client will refresh attribute information from the server.uid=1000: This sets the user ID (UID) for the mounted filesystem. In this case, it's set to1000.gid=1000: This sets the group ID (GID) for the mounted filesystem. In this case, it's set to1000.nofail 0 0: This option ensures that if the mount fails during boot, it won't prevent the system from starting up. Thenofailoption indicates that the system should continue to boot even if the mount fails.
Solution for mounting issue#
In deploying the Raspberry Pi, I have found an issue with the mounted drive not showing up in Calibre. This appears to be an issue with the container loading before the drive has been mounted. A solution I have found that works successfully, has been the inclusion of two scripts in start up. The calibre-delay-script.service and calibre-restart-script.service. These scripts make sure the Azure share is mounted, and after a 60 second pause the second script runs which restarts the Calibre Docker container. This resolves the issue and the add books folder operates as expected.
Create the first script:
sudo nano /etc/systemd/system/calibre-delay-script.serviceAdd the following content to the startup script to enable the mounting of the share. This scipt runs the command mount -a after a 10 second delay:
[Unit]Description=Calibre Delayed Script
[Service]Type=oneshotExecStartPre=/bin/sleep 10ExecStart=/bin/mount -aRemainAfterExit=yes
[Install]WantedBy=multi-user.targetCreate the second script:
sudo nano /etc/systemd/system/calibre-restart-script.serviceAdd the following content to the second startup script to enable the mounting of the share. This scipt runs the command restart calire after 60 second delay:
[Unit]Description=Calibre Delayed Script
[Service]Type=oneshotExecStartPre=/bin/sleep 60ExecStart=/usr/bin/docker restart calibreRemainAfterExit=yes
[Install]WantedBy=multi-user.target
enable both the new scripts and reboot the Raspberry Pi
sudo systemctl daemon-reloadsudo systemctl enable calibre-delay-script.servicesudo systemctl enable calibre-restart-script.servicesudo rebootConfigure the Calibre Server#
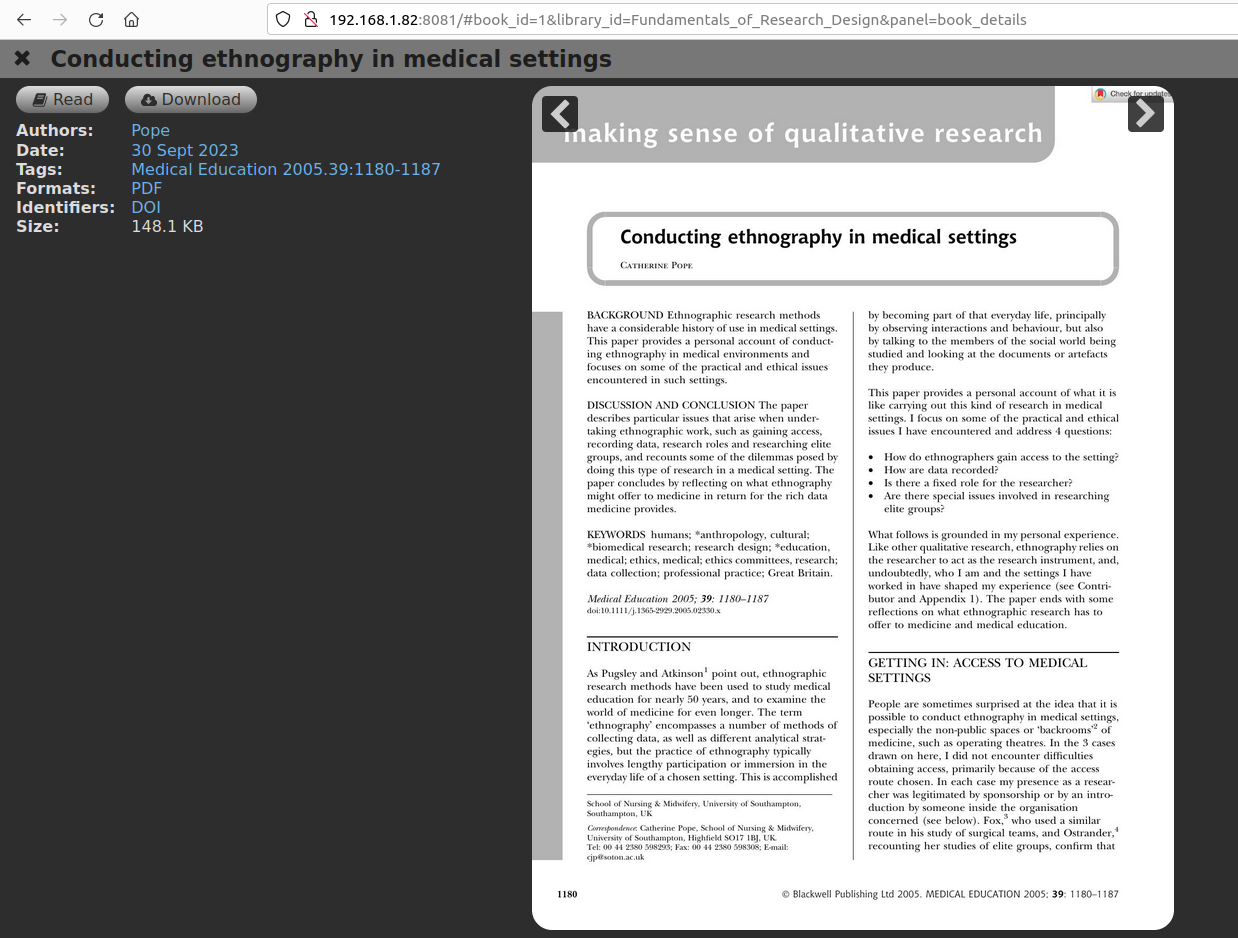
By default you will get the Calibre Book Management on port 8080. In this admin window, you can go to preferences and enable the more user friendly Calibre Web server on port 8081.
You need to go to perferences > Sharing > Sharing Over The Net
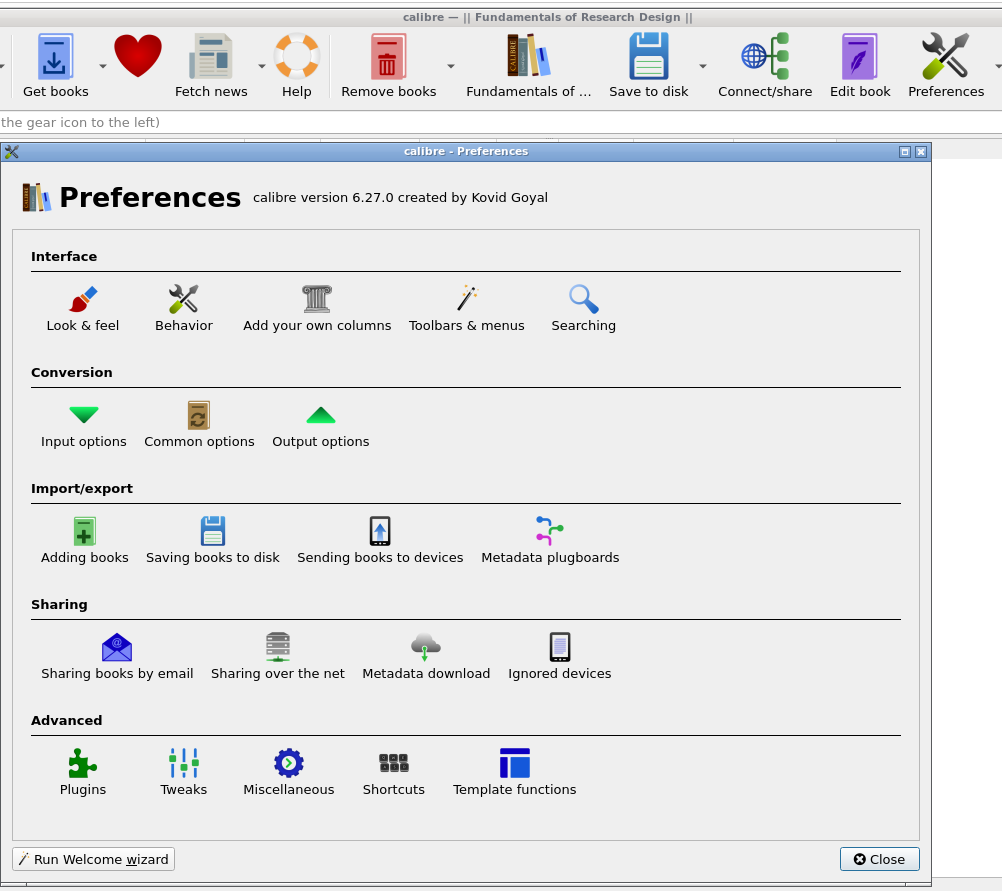
Make sure you active the server on port 8081 and tick automatically start when Calibre starts

The web portal on port 8081 enables easy browsing between libraries.
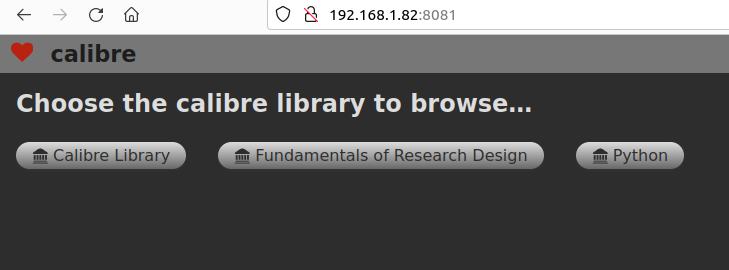
Content can either be read in browser or downloaded to local device.
Conclusion#
Now we have a fully functioning eBook management system, with easily accessible libraries over our home network. Calibre offers great tools for both the management of eBooks and for browsing the libraries. This turned into a really enjoyable project. Getting Docker working the Raspberry Pi initially I found to be problematic. Eventually, I switched from the 32 bit version of the operating system to the 64 bit version. This resolved the problem and enabled me to quickly get Docker and the Calibre container set up. Setting up an Azure File share was easy, but I did have to spend time trouble shooting why the Calibre Container could not see the content after a reboot. Fortunately, I enjoy problem solving IT issues, and found that mounting and restarting the Calibre container resolved the issue. After a couple of start up scripts were added, the ebook project worked as planned.